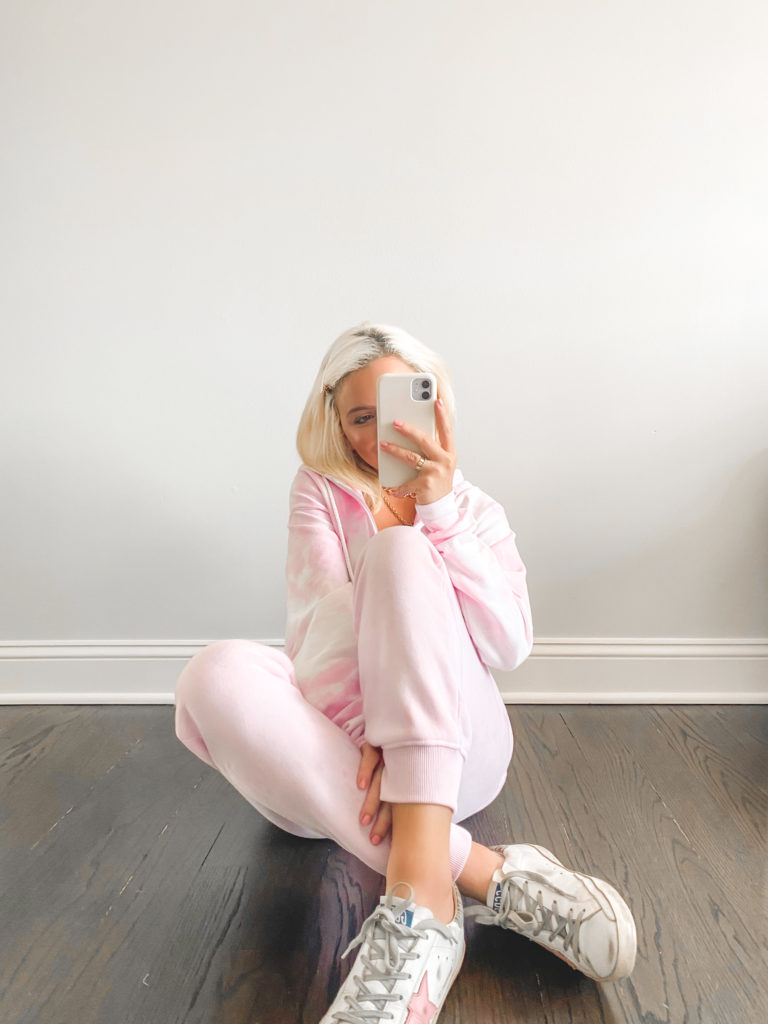
I know what you’re thinking, why does everyone during quarantine feel the need to go through their closet and start coloring, bleaching, and distressing everything they have ever owned? Well, the answer is simple.
First of all, being creative allows any person, regardless of gender, to connect with a fresh side of themselves that maybe we have not seen in a while. It’s important for us to be in touch with our creativity in times when many other things seem out of reach or uncontrollable. In fact, one of the things that causes many of us anxiety during this time is the fear of the unknown. So, if we can control a few little things — even if they seem as small as cleaning out our closets or creating a new tie-dye set — then, we have accomplished a lot for our mental health. I have been dying around 2 or 3 items a day and playing around with a bunch of colors. It has definitely been a great creative outlet for me, and I would love for anyone curious to also give it a try!
I know there are a bunch of tutorials out there, but this is just how I did it. Also, I want to mention that the sweatpants in these pics did not dye as well as I had hoped, so instead of buying these from amazon, I would suggest buying them from Pretty Little Thing. They’re sold out right now but I know you can get similar ones on sites like Nasty Gal, Misguided, etc. I’m not sure why, but finding good sweatpants for tie-dying is super difficult on Amazon. As far as the sweatshirts go, I have been super successful in buying them from Amazon: you can find them here and here.
As far as the dye goes, I’ve been using RIT dye. If you want to just start out using the pink dye, you can find it here. You can also pick other colors using this link as well.
*Don’t forget, you also need gloves, old newspaper, trash bags, and rubber bands!
Once you have your materials, you can begin.
PINK TIE DYE STEPS
- Set them all up in a place that you don’t mind getting a little messy (outside, in a laundry room, driveway, etc).
- Wet the clothes that you will be dying with water.
- Ring them out so they’re damp and then start rubber-banding. I would say my trick to this step is to be as RANDOM as possible. If you want your outfit to look casual and natural without a distinct “swirl” in the middle or pattern, just start bunching random parts of the arms and legs up. Make as many rubber band bunches as you can and then connect the bunches if you can. The more you bunch up, the more white space will be on your finished product.
- Time for the color! Take a cup of water and mix in a few drops of your color. For the pink, if you want a more pastel color, only use a few drops of the color and mix it with the water. If you want a darker color, add enough drops until you get to a dark pink/purple-ish color. It’s going to look darker in your cup of water than it will on the fabric, so don’t worry about it looking too dark!
- Now, put your damp and rubber-banded items flat on some newspaper and start randomly pouring the color on top of the items.
- Next, put the items in a trash bag or a safe place to dry and let sit for 24 hours.
- After 24 hours, take out the rubber bands and put the items of similar colors in the washer together for a normal wash.
- Put in the dryer and you are now ready to enjoy your new set!
This blog post was originally written for 28 Row, which you can find here.


Leave a Reply